INNOVATIVE MAN |
|
|
I found a few ideas and plans on how to do this, most leaving a lot up to the imagination on how best to complete it. I thought it would be great if I can create a process on how to best do this, and leave far less up to the imagination for those who would prefer more instruction. Here is your materials list and steps for part 1: Materials:
Step 1. I took three sheets of 4 feet x 8 feet of pink poly styrene cut 1 in half. I than took one full sheet and glued a 4 foot sheet to one half of the full sheet using a bit of the epoxy resin. You could use the construction adhesive here, but I truly recommend the epoxy, especially for this stage. Next took the final full sheet and glued half of it to the remaining half of the sheet I just glued. Once hardened (for me with the slow hardener that was 24 hours) I flipped it and glued the final 4 feet section onto the other side. What I was left with was a 4 feet by 12 feet laminated sheet that is now 4 inches thick.
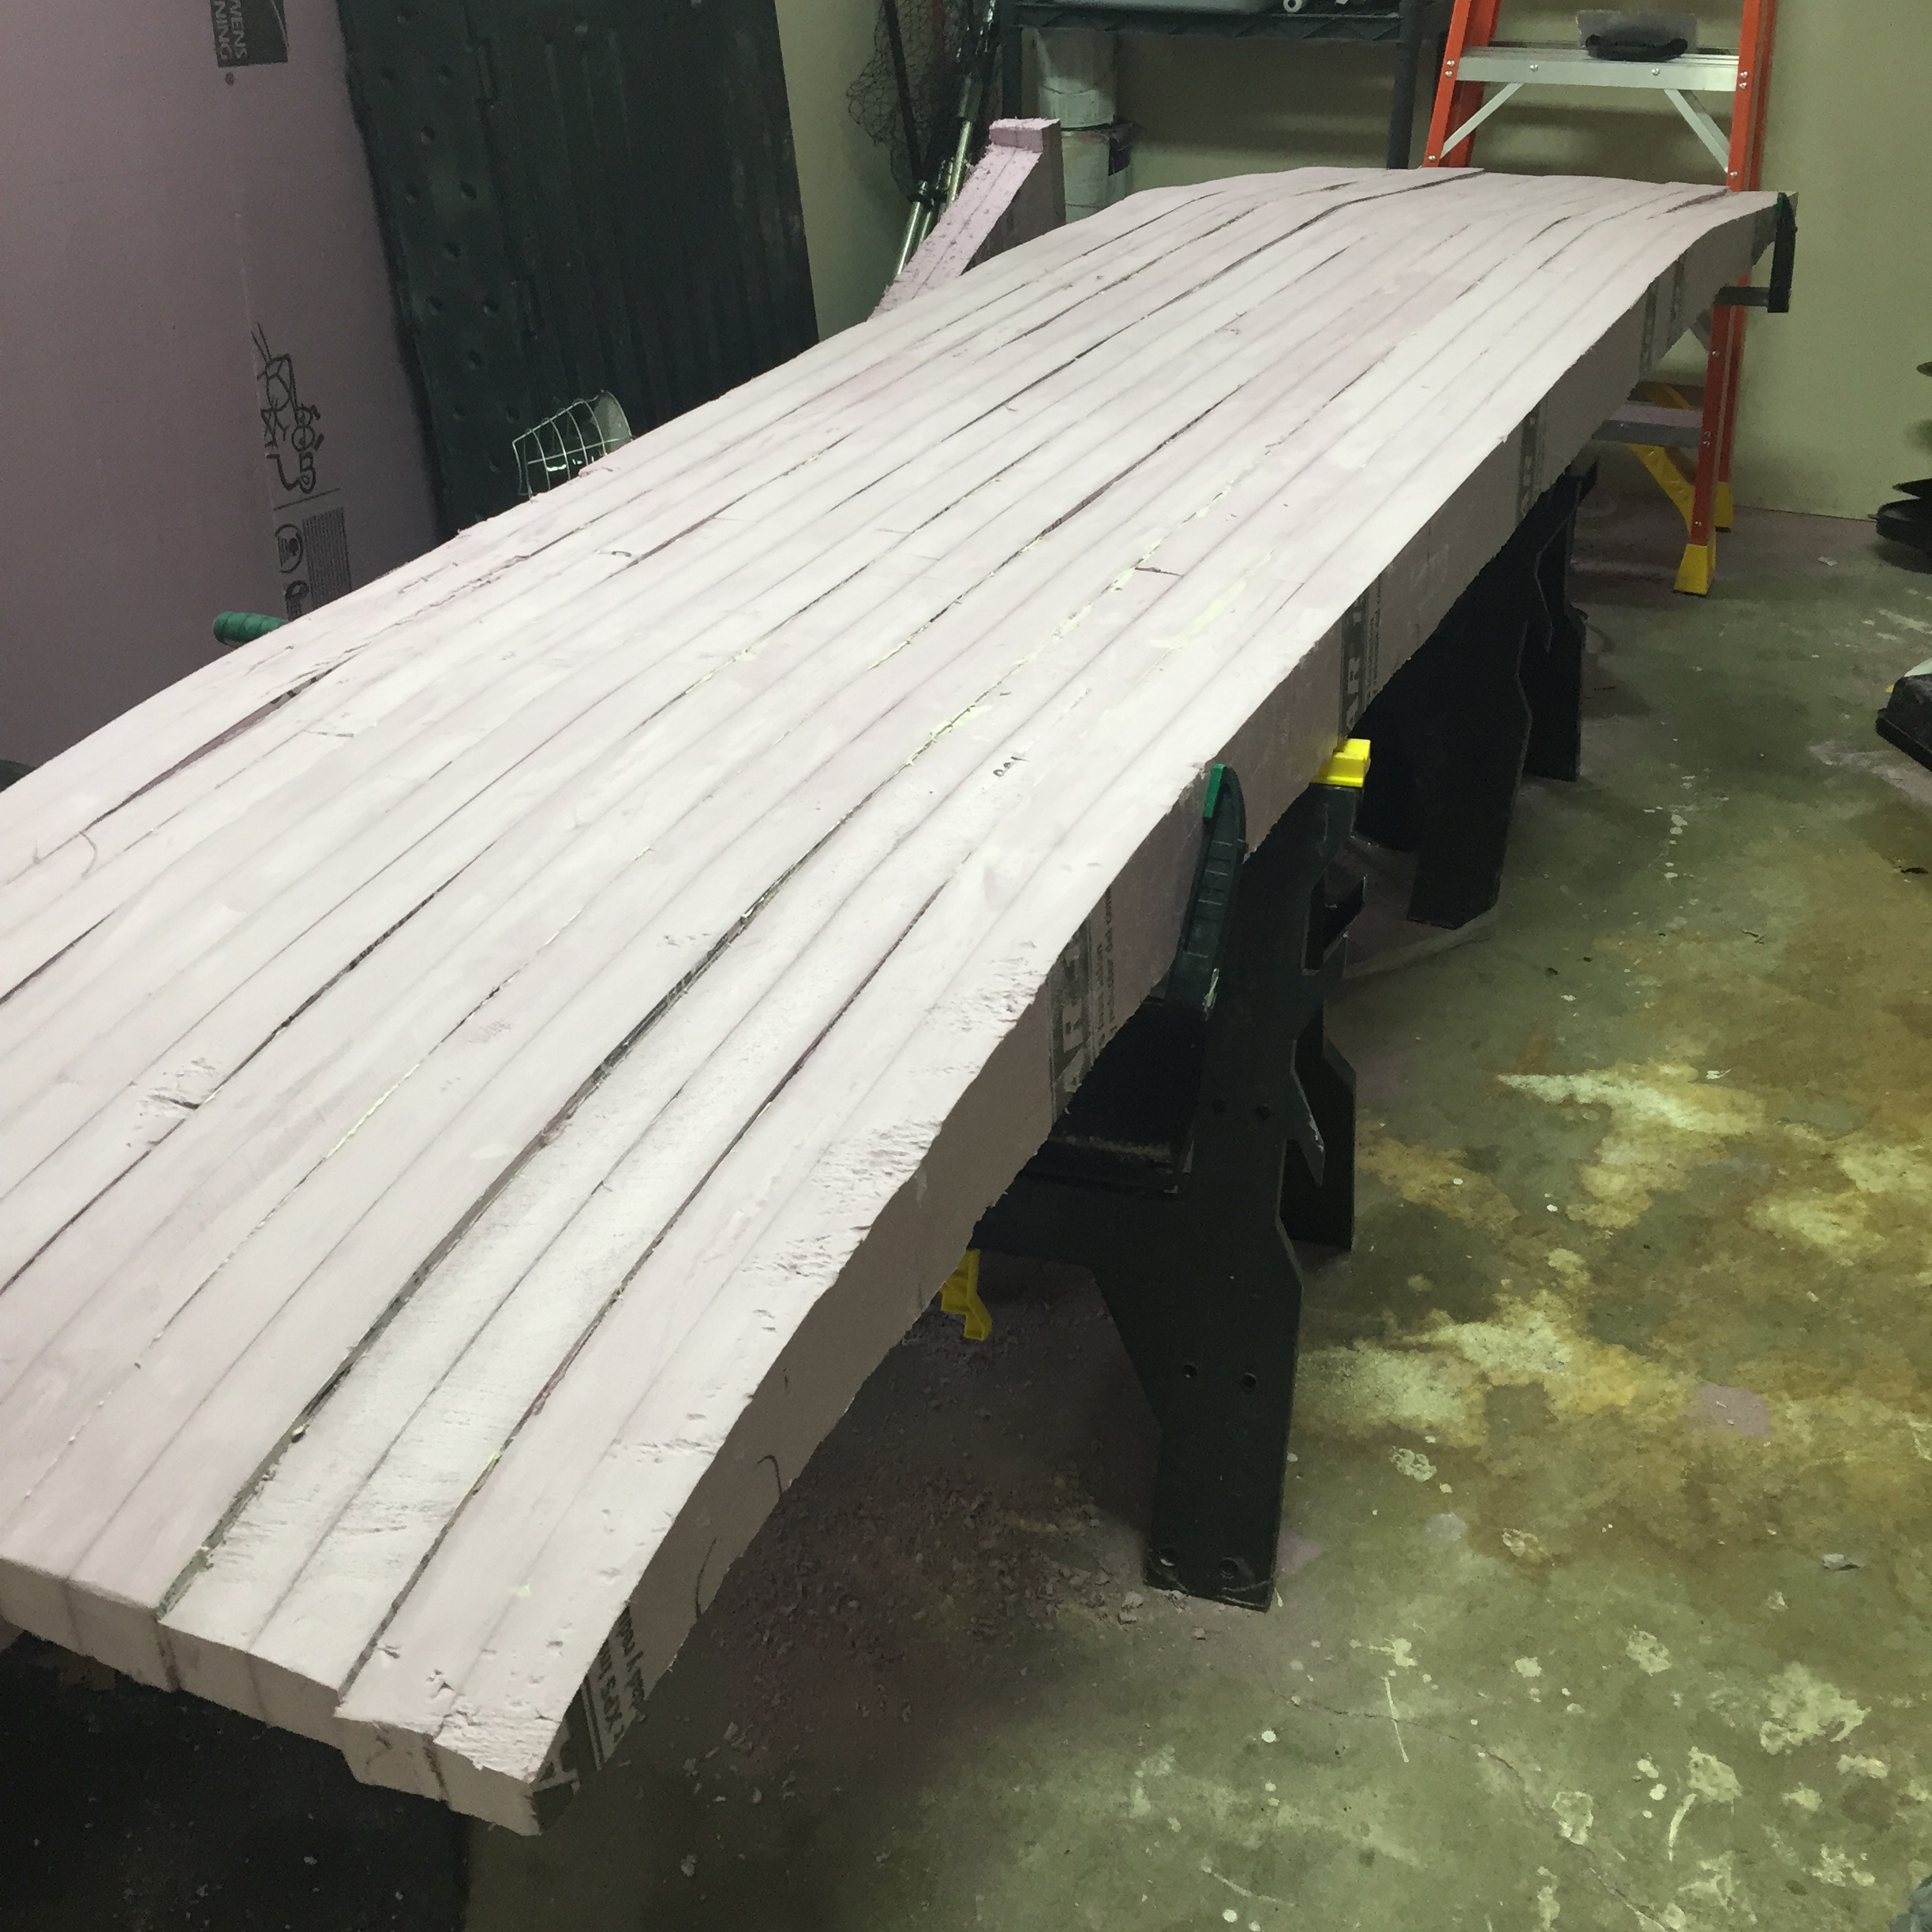
Step 2. Use the red resin paper to create the side profile of the board you wish to build to exact specification of length and width and proper taper. You than take scotch tape and tape it flat to the now fully hardened foam laminate and cut out the needed strips of your board to create the actual thickness of you board. If you board is going to be 28 inches wide than you will need 7 of these side profiles since the laminate is 4 inches thick, i.e. 4 inches x 7 strips equals 28 inches. I would recommend putting your template on the board, tracing with the black marker and laying out all the needed side profile before cutting. Than cut using either the reciprocating saw (recommended method with a metal blade for finer teeth) or the sheetrock saw. I would give yourself a quarter to half inch of pad all the way around for shaping purposes.
Step 3. Shape the bottom of the board down to the magic marker line on the bottom of the board leaving the line and even a hair more if desired. Do not shape the top as well because there is play in your template and your profiles will not all match up so you will need to be selective which side profiles will be best where once gluing them to each other because you have some leeway with the front and a back being tapered in some. This will become clearer when you actually do it.
Step 4. Determine the optimal order for your profiles to be glued together and glue them together using epoxy or construction adhesive. I would recommend the epoxy resin, but I would get the fast setting specifically for this if you are to. I used the construction adhesive and it worked great for the most part.